Recently I had a customer ask me how to tell Drupal 8 to display certain blocks conditionally, based on whether or not the node page being viewed referenced certain taxonomy terms. In Drupal 7 I would have recommended the Context module for this, but as it’s not yet ready for Drupal 8 I had to go looking for other options.
My search led me fairly quickly to the brand-new Block Visibility Groups module, which aims to provide the same sort of conditional block visibility functionality that Context provides, but in a manner that integrates more closely with the core Block UI. It works well, but doesn’t natively provide support for basing visibility off of node field data (such as taxonomy term references). However, since Block Visibility Groups uses the core D8 Condition plugin type to define its conditions, all that’s needed is to implement a custom plugin to get the desired behavior. Here’s how it works, from start to finish:
First, some assumptions
For this example, I’d like to display a basic “Visit our store” block whenever the user views any node tagged with the term “product” in any taxonomy term reference field.
Creating the Term condition plugin
Throughout this post I’m going to lean heavily on the code generation features found in the Drupal console project. If you don’t already have this installed, go and take care of that right away —you will be amazed at how much development time it can save you.
It’s also worth noting that while developing this plugin, I referred frequently to other condition plugins already in Drupal core. For a complete list, please refer to the API documentation for ConditionPluginBase, the base class I’ve extended.
Generating a new module
First, I created a new custom module in which to put the new plugin class. The simplest way to go about this is to run drupal generate:module, one of the commands provided with the console project I mentioned earlier. Drupal console commands will often ask a series of questions to help fine-tune how the code is generated; in this case, I answered as follows to create the shell code for the new term_condition module:
- Enter the new module name:
Term Condition - Enter the module machine name:
term_condition - Enter module description:
Provides a Condition plugin which checks to see if a node references a particular taxonomy term. - Would you like to add module dependencies:
yes - Module dependencies separated by commas:
taxonomy
The end result of all this is a brand-new module shell in the site’s modules/custom directory, which can be edited at will.
Generating the Condition plugin
Next, to create the stub code for the new plugin, I ran drupal generate:plugin:condition. Once again, I was asked quite a few questions to help configure the generated code properly:
- Enter the module name:
term_condition[this is the name of the module that will contain the new plugin code, so I used the module we generated earlier] - Enter the plugin condition class name:
Term - Enter the plugin condition label:
term - Context type:
[1] Entity - Context entity type:
[0] Content - Context definition ID:
[2] Content - Context definition label:
node - Context definition is required:
yes
Those last few items (“Context…”) deserve a bit of explanation. The new plugin class is going to be provided with some information about the site context in which it’s being run —in this case, the node that’s currently being viewed. By providing this information to the generator script, I ensured that the new class code was preceded by the proper PHP annotations to set up this context expectation:
With that @ContextDefinition in place, the plugin will always have access to the node being viewed, which in turn facilitates inspection of its taxonomy term reference fields.
Completing the Condition plugin
The new plugin class stub will be stored in the new module’s src/Plugin/Condition directory. The generated code already includes all of the methods needed; all that’s necessary at this point is to modify them to fulfill the desired use case.
Term::buildConfigurationForm()
This method, along with the other *Configuration methods discussed below, defines how the user will provide configuration options for the plugin. In this case, the user needs to be able to select a single taxonomy term to look for in the provided node context. To accomplish this, I used an entity_autocomplete field like so:
 'entity_autocomplete',
    '#title' => $this->t('Select a taxonomy term'),
    '#default_value' => $this->configuration['tid'],
    '#target_type' => 'taxonomy_term',
  );
  return parent::buildConfigurationForm($form, $form_state);
}
?>
(Side note: the Drupal 8 Form API documentation is presented very differently than what I was used to in Drupal 7. I recommend starting with the Form API landing page for the basics and then regularly reviewing “All classes that implement FormElementInterface” to find out what kinds of fields are supported.)
Term::submitConfigurationForm()
This method will be called whenever the form built in buildConfigurationForm() is submitted. All that’s needed here is assign the select taxonomy term tid to the plugin’s configuration, like so:
configuration['tid'] = $form_state->getValue('tid');
  parent::submitConfigurationForm($form, $form_state);
}
?>
Term::defaultConfiguration()
This method is used to populate the plugin’s configuration options with sensible defaults. In this case, the only sensible default is to leave the tid option set to NULL —so instead of overriding this method, it’s best just to remove it entirely.
evaluate()
This method is where the condition is actually tested —in this case, whether the provided node context contains a reference to the taxonomy term selected in the configuration form.
configuration['tid']) && !$this->isNegated()) {
    return TRUE;
  }

  $node = $this->getContextValue('node');
  foreach ($node->referencedEntities() as $referenced_entity) {
    if ($referenced_entity->getEntityTypeId() == 'taxonomy_term'
      && $referenced_entity->id() == $this->configuration['tid']) {
      return TRUE;
    }
  }

  return FALSE;
} ?>
summary()
This method is used to provide a simple human-readable summary of what the condition is. (Note that in the example below, I could have made things a bit more UX-friendly by actually loading the taxonomy term and printing its label in the message, rather than simply its ID; for the sake of this exercise I’ve avoided that.)
configuration['tid'];
  if (!empty($this->configuration['negate'])) {
    return $this->t('The node is not associated with taxonomy term @tid.', array('@tid' => $tid));
  }
  else {
    return $this->t('The node is associated with taxonomy term @tid.', array('@tid' => $tid));
  }
}
?>
That’s all the methods! Next, it’s time to create a simple block visibility group using the new condition plugin in conjunction with the Block Visibility Groups module.
Creating the Block Visibility Group
First, I made sure that the new module was enabled and that the site’s caches were cleared; otherwise, Drupal wouldn’t find the new condition plugin.
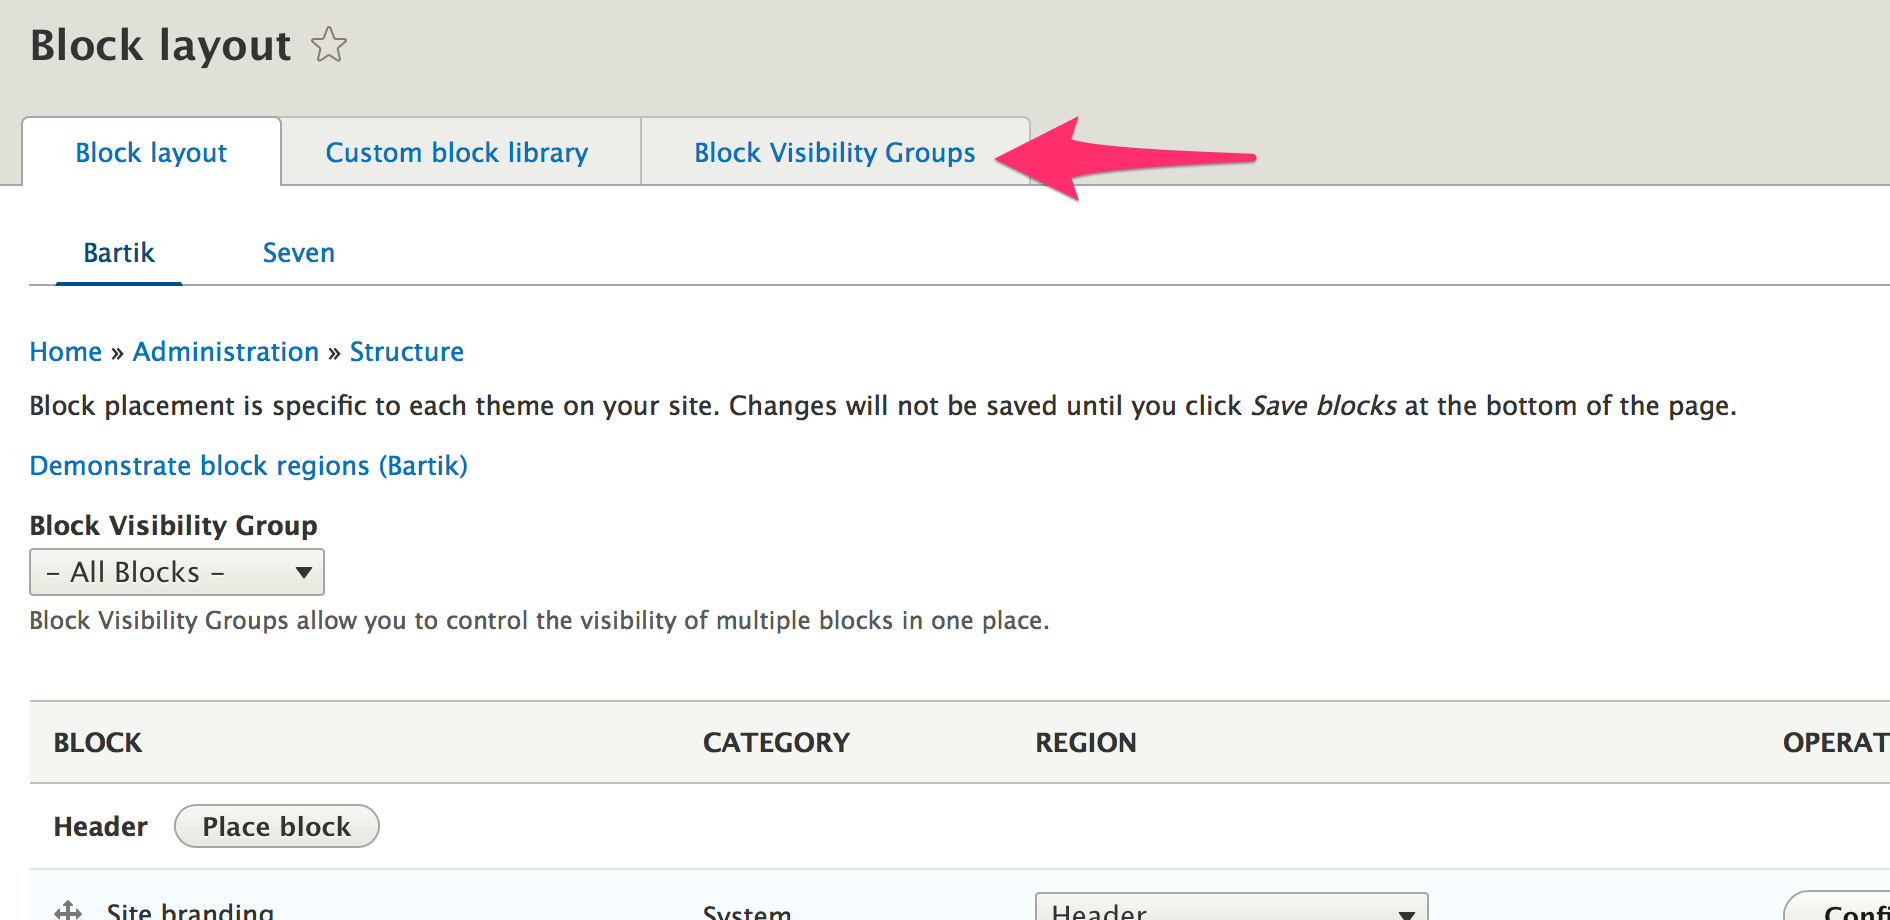
Once that was done, I logged into the site as an administrator and navigated to the “Structure > Block layout” administration page. The Block Visibility Groups module provides a new tab along the top of the UI (appropriately titled “Block Visibility Groups”) as well as some other new UI components just above the blocks table. To configure my new group, I began by clicking the new tab:

From there, I clicked the “Add Block Visibility Group” button:

On the following page, I entered the name of the block visibility group; since this group is intended for product pages, the name “Product pages” works nicely.

After saving the new group, I headed back to the standard “Block layout” tab. Selecting my new group from the “Block Visibility Group” select widget allowed me to see the conditions and block assignments associated with my new group, like so:

To configure the conditions under which this group of blocks becomes visible, I opened the “Conditions” tab and clicked “Add new condition:”

This brought up a modal dialog allowing me to choose from the various kinds of Condition plugins that exist in this Drupal site —in this case, I selected the “Term” option provided by my new condition module:

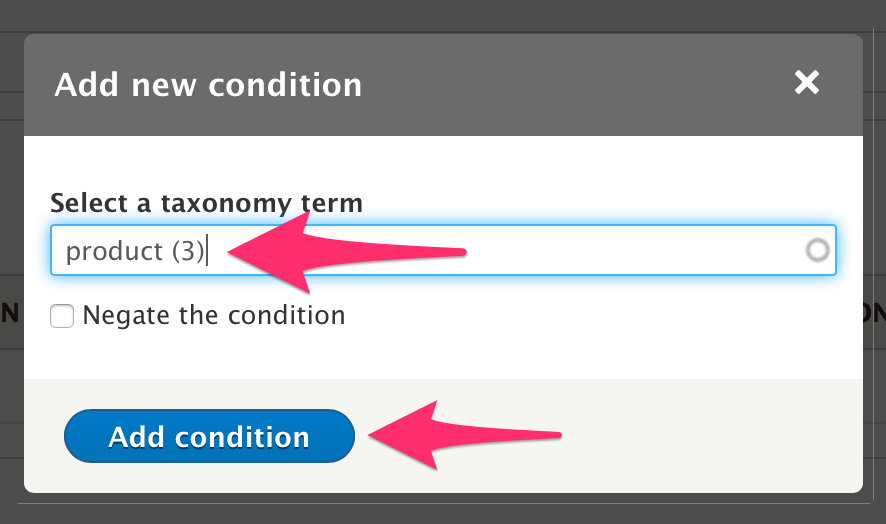
This brought up the form created earlier, allowing me to enter in the taxonomy term I wanted to use:

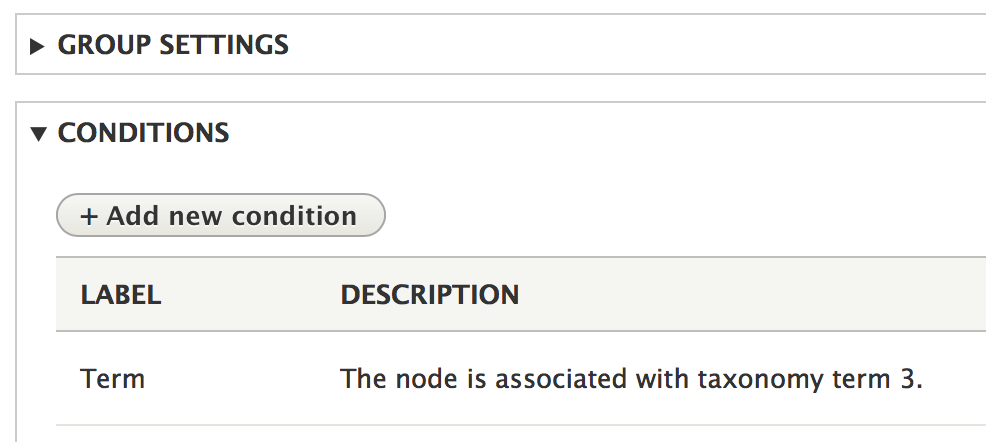
Upon completing that form, I was taken back to the standard Block Layout page, and the Conditions section was updated with my new condition, like so:

That’s all the new stuff —from here, all I needed to do was fill out the rest of the Block Layout page with the blocks that should appear when this condition is met. Since the plan was to create a “Visit our Store” block for any nodes with the term “product,” the last few steps were simple —I did as follows:
- Navigate to the “Custom block library” tab.
- Click “Add custom block.”
- Fill out the appropriate information for the “Visit our Store” block, and save it.
- Go back to the “Block layout” tab.
- Select the new Block Visibility Group from the dropdown.
- Scroll to the appropriate region and click “Place block”.
- Find the new block in the list and click its “Place block” button; fill out the following form as appropriate and save.
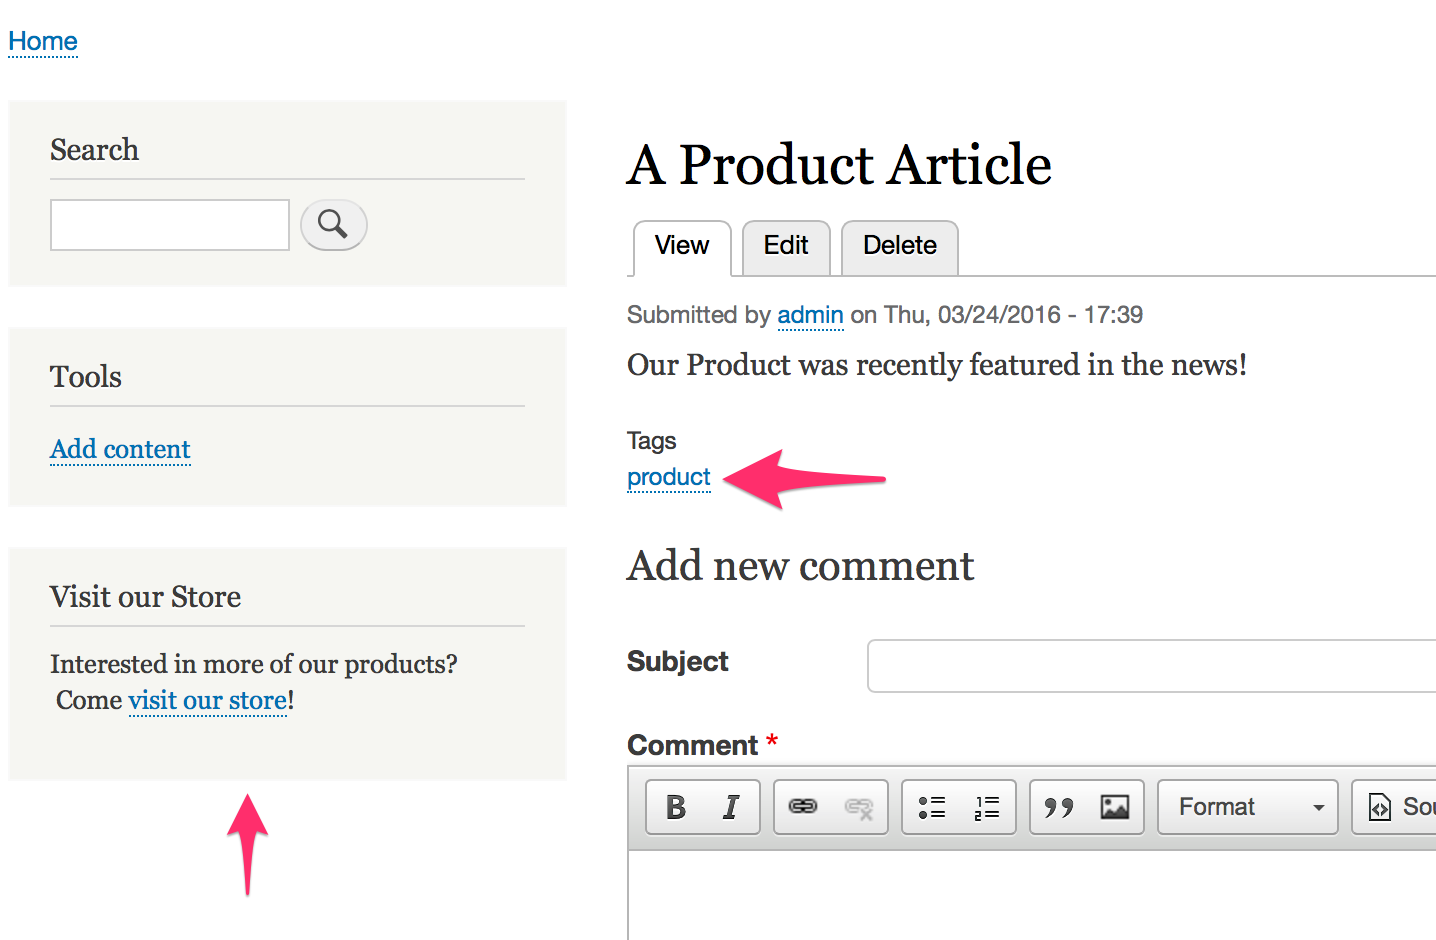
From this point forward, any node with the “product” tag automatically displayed the “Visit our store” block in the selected region, like so:

The beauty of this approach is that since it’s based on simple Condition plugins, you can follow these same basic steps for any kind of block layout conditions you might want; this is just one simple example.
For further reading
The code presented in this article has been contributed as a standalone module at https://drupal.org/project/term_condition. Please feel free to use it in your projects, or as an example from which to build other interesting Condition plugins.


