In my role as a Solutions Architect at Acquia, it’s exciting for me to be working with a growing number of customers who are moving from agile development processes to Continuous Integration (CI) and even Continuous Delivery (CD) processes.
Acquia Cloud CD provides the platform to enable this migration, however customers often ask us for best practices on their journey to a fully automated Continuous Delivery/Deployment model.
One area that is frequently discussed is the best approach to create database instances for testing. One key to an effective continuous integration workflow is to minimize the build and test time for every push to a repo or pull request.
It’s also important to execute your automated tests, whether they are unit or functional tests, on a recent snapshot of your production database. Since large databases can take several hours to load you will want to prune your data to be as small as possible while also achieving 100% test coverage.
Starting with Cron
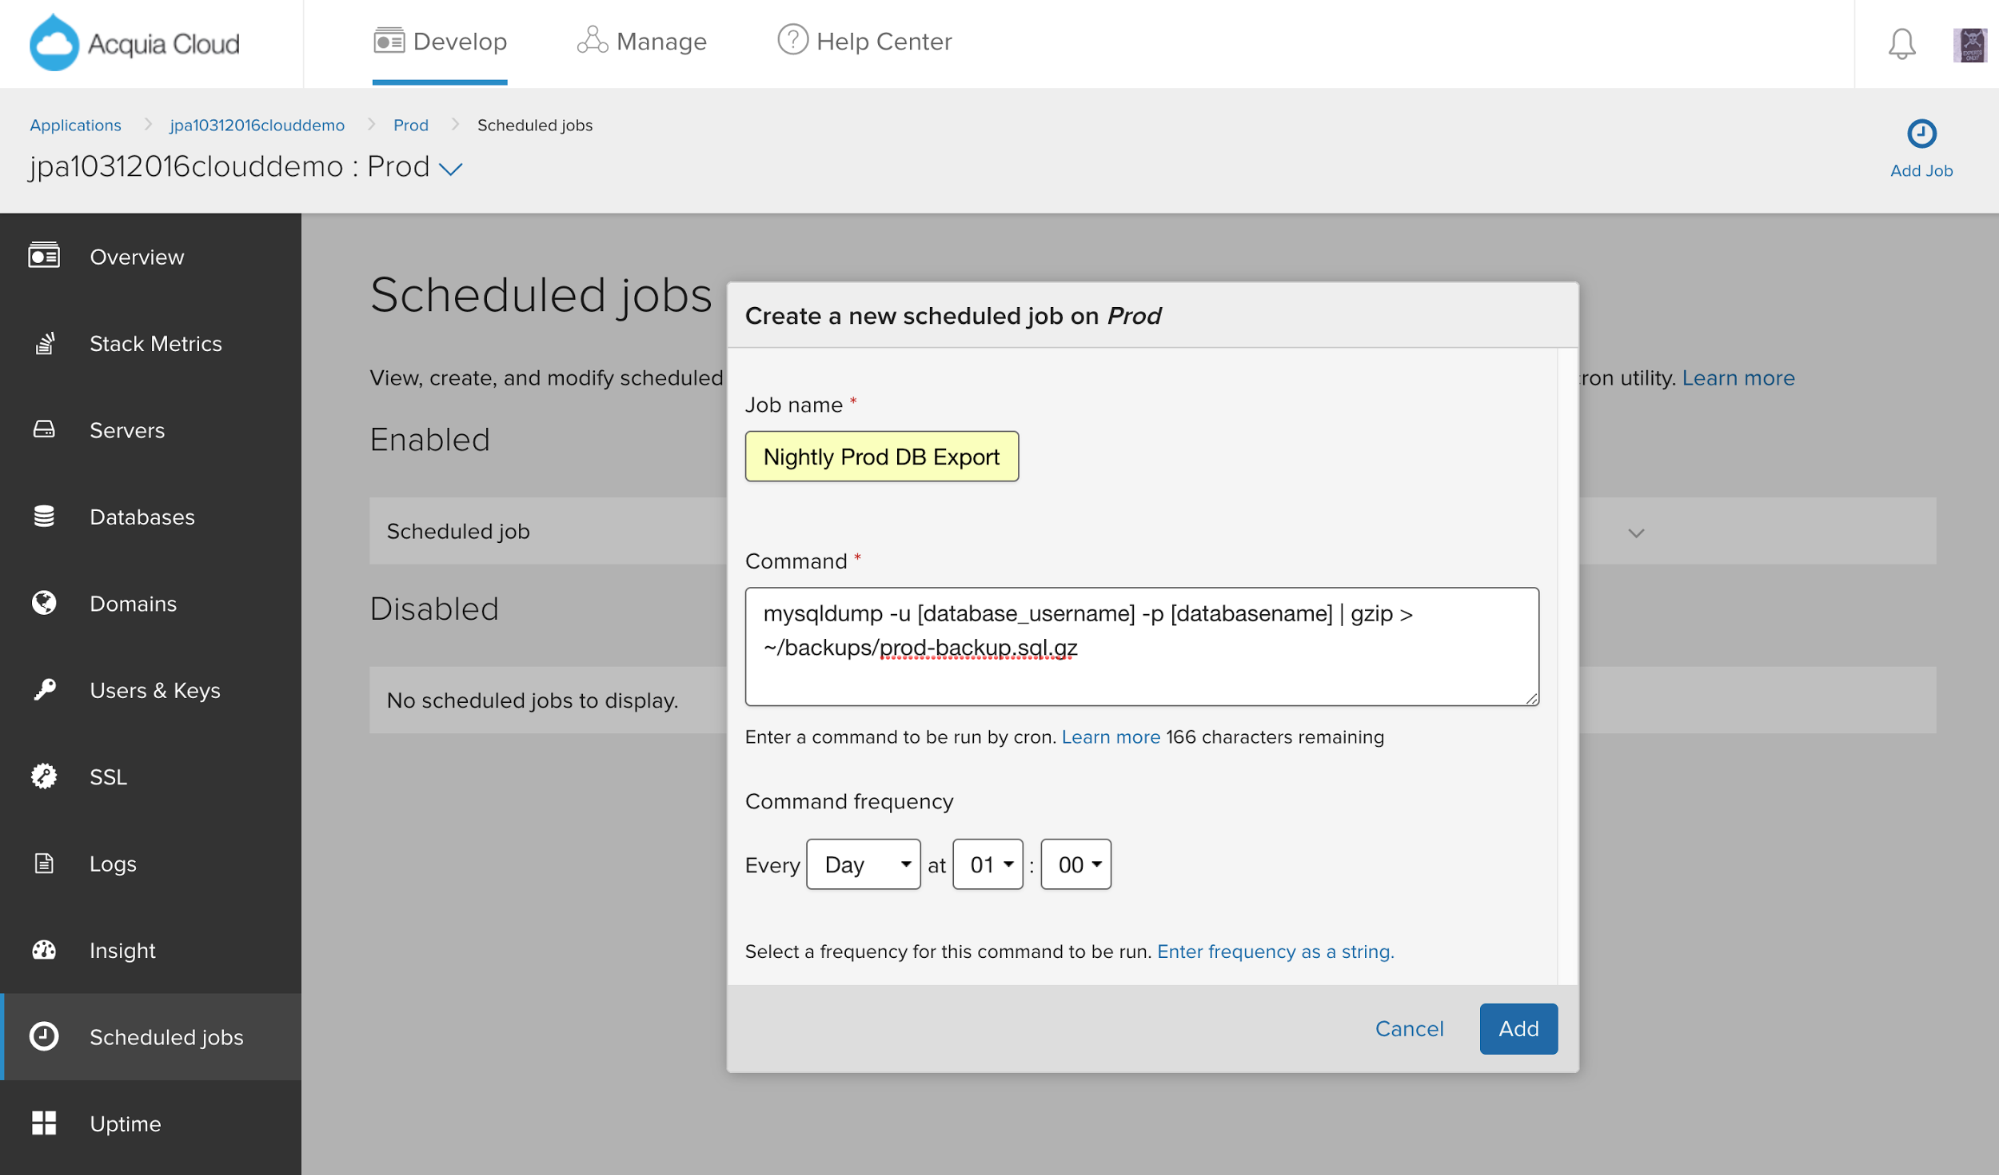
For most development groups the first step in creating usable test databases for their CI process is to have a nightly cron job creating a mysqldump of their production database. This can easily be accomplished with the graphical interface to Cron in Acquia Cloud’s UI. Make sure to create this on your Acquia Cloud production environment.

Figure 1. Creating a Cron job to do a nightly export of a production database
There are large number of options available in the mysqldump command which you can read about here.
Copying your Database Snapshot
Many organization always have the master branch of their code on a Staging environment that can be safely deployed to production at any time.
In this example, we’re going to copy over the nightly production database snapshot to our Staging environment, then add some commands to scrub the data prior to importing it into the Staging database.
To copy the production database snapshot we will use the Linux SCP command:
scp [email protected]:prod/backups/prod-backup.sql.gz [email protected]:test/import/
Note that we could add this command to the above cron job on production, but we want to do the absolute minimal amount of work on our production server, so we’re going to put the above command and below steps for Staging into a cron job running on the Staging server, scheduled to execute overnight after the production database export job is complete.
You will want to ensure that you leave a safe buffer zone of time between the creation of the production database copy on your production environment and the start of your cron job on staging to consume the copy and begin the below scrubbing process.
Next we’ll unzip the mysqldump file:
cd ~/import gzip -d prod-backup.sql.gz
Scrubbing your Database
There are three distinct transformations we need to make on the production database copy before importing it into Staging:
- Remove sensitive information such as people’s names, email addresses, and passwords.
- Change system variables appropriate for a test/staging server, such as turning off SSL, putting the payment module into test mode, etc.
- Truncate large system tables not needed for testing, such as Drupal’s cache tables.
You will typically want to create a custom database-scrubbing process that is particular to your schema, however a good starting point is the db-scrub.sh script on Acquia’s cloud-hooks public repo.
Since the unzipped production database is just a text file, we can simply add the SQL commands to scrub the data to the end of the prod-backup.sql file.
One optimization you can make to save time is to export your production database copy without the contents of Drupal’s cache tables, but keeping their structure, using the Drush sql-dump command:
drush sql-dump --structure-tables-list=$(echo 'show tables like "cache%"' | drush sqlc --extra=-N | paste -s -d, -) > prod-backup.sql
Importing your Scrubbed Database into Staging
Now that we’ve scrubbed the production database copy we’re ready to import it into Staging. We’ll use the drush command to drop all tables in the Staging database and then the sql-connect command to import the scrubbed database file. cd /var/www/html/PROJECT.test/docroot drush sql-drop -y drush sql-connect < /home/PROJECT/prod-backup.sql
Pruning your Scrubbed Database for Dev
While we’re importing the scrubbed production database copy onto Staging we will start to import a copy into our Dev environment. The Dev database instance will be our master test database that can be cloned and then used by Cloud CD on-demand environments, CDEs, to support the execution of automated test suites.
Even though we’ve reduced the size of the production database copy, by truncating Drupal’s system tables such as caches, sessions, and watchdog, we might still have a very large database - too large for effective test execution.
The goal of this step is to reduce the size of the database such that it is as small as possible but supports 100% test code coverage.
Unfortunately there is no silver bullet here - you will have to determine for your specific Drupal instance what data you can delete and still execute all of your functional and unit test suites.
To start, go into phpMyAdmin, find your large tables, and then you can determine what patterns of rows of data you can delete that will not be needed for testing. This will often require a number of rounds of iterations.
Now that Drupal primarily uses InnoDB as the default storage engine for most tables it can take a long time to import a Drupal database. So if possible, we’d like to delete rows of large tables by editing the newly scrubbed production database mysqldump text file with an editor like SED before we do the database import. This may or may not be possible depending upon the pattern of data you need to delete.
We can now import the scrubbed, and possibly partially pruned database file into our Dev environment. cd /var/www/html/PROJECT.dev/docroot drush sql-drop -y drush sql-connect < /home/PROJECT/prod-backup.sql
After the database import we can use SQL scripts to further prune data not required for testing.
For very complex database pruning functions we may want to write specialized PHP code and embed these functions into our test scripts as setup functions. If we do add any post-import data pruning we will then need to export a copy of the Dev database using mysqldump to be used as a clonable test database master.
The Final Step!
At this point we have a full copy (scrubbed of sensitive data) of the production database on Staging, the same copy pruned with unnecessary data for testing on Dev. We can now use the Dev database as a master to clone for our CDEs spun up by Pipelines builds with Acquia Cloud CD.
Acquia Cloud contains a full API that helps with the automation of many tasks, and we’re going to use a Cloud hook to automate the copying of the pruned database on Test to our CDE. An example hook to accomplish this is: #!/bin/bash # # Cloud Hook: post-code-deploy # # The post-code-deploy hook is run whenever you use the Workflow page to # deploy new code to an environment, either via drag-drop or by selecting # an existing branch or tag from the Code drop-down list. See # ../README.md for details. # # Usage: post-code-deploy site target-env source-branch deployed-tag repo-url # repo-type site="$1" target_env="$2" source_branch="$3" deployed_tag="$4" repo_url="$5" repo_type="$6" if [ "$source_branch" != "$deployed_tag" ]; then echo "$site.$target_env: Deployed branch $source_branch as $deployed_tag." else echo "$site.$target_env: Deployed $deployed_tag." fi re="^ode*" if [[ $target_env =~ $re ]] then echo 'Target name is: ' $target_env '. This is a CDE.'; echo 'Syncing database from Test.'; drush sql-sync @myenvironment.test @self
Summary
Thanks to Acquia Cloud CD’s on-demand environments, automation with Pipelines, and Cloud hooks, we are able to create a completely automated method for always having recent copies of production data available in Staging, Test and CDE environments.
Special thanks to Cameron Tod and Rick Vugteveen for contributions to this blog post.


