The Scenario
Some time ago we were contacted by a client to execute a migration: from a soon-to-be decommissioned site into Drupal.
Just when we thought that it would be a simple process, the requirements came in: “Migrate the data from Site A into Drupal, but also join data from Spreadsheet X, and some data already inside the Drupal website.”
To handle such complicated task, with so much different data, we chose the Migrate module to make our lives easier.
In the beginning, we had the following data to work with:
- A CSV file with data from the old site
- Another CSV file generated from a spreadsheet
- A Node with custom type in the current site
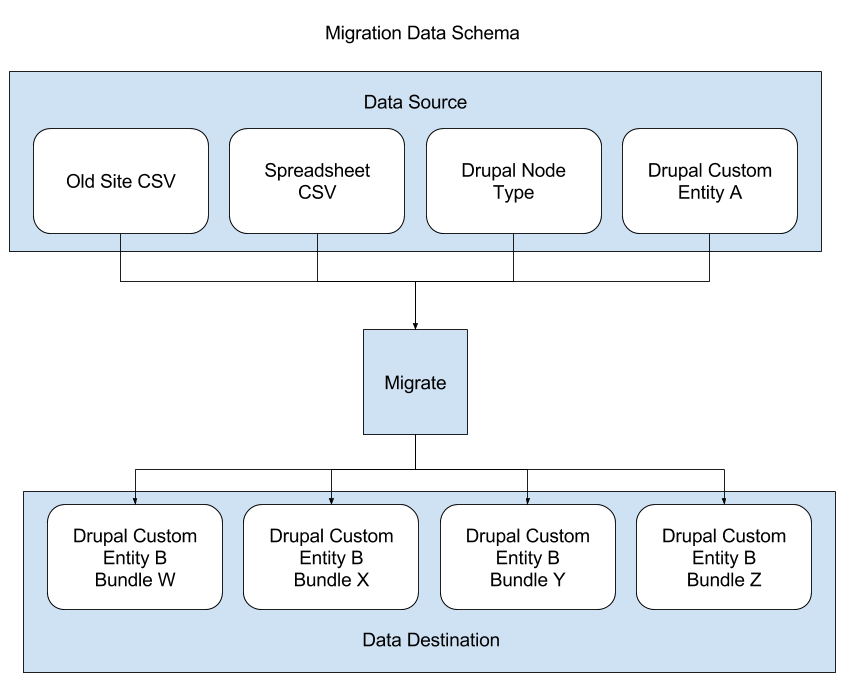
- A custom entity also in the current site
Code Structure
Our starting point was to create an admin page to import the CSV files into custom database tables. From there, we were able to query all that information and use the columns that all four sources had in common to link all the fields together.
In order to hold the new data that would be migrated, a new custom entity was created. By following the requirements, some bundles with different fields were also created for that entity. The following image illustrates the migration schema:

After some discussion as to how the data would be handled, we decided to create one Migrate class per migration scenario. So a base class was created to contain most of our default code, and one child class per migration scenario.
Some methods were defined in the parent class to make it easier to build our large query. This way of coding was chosen so we could create classes that would extend the base one, and have only the custom rules for that migration scenario. We created methods like getJoins() that would return an array with the information for the db_select join() method, or getConditions() that would return the information for condition() method. With these custom methods in place, if a child class needed to customize something, it could override only that method and implement its own rules.
Another requirement for the migration was that each scenario should run in a particular order, to ensure that the new data would be consistent with the old site. In order to do so, we have taken advantage of the dependency feature from the Migrate module, and used that to enforce the order in which each migration would run.
Data Handling
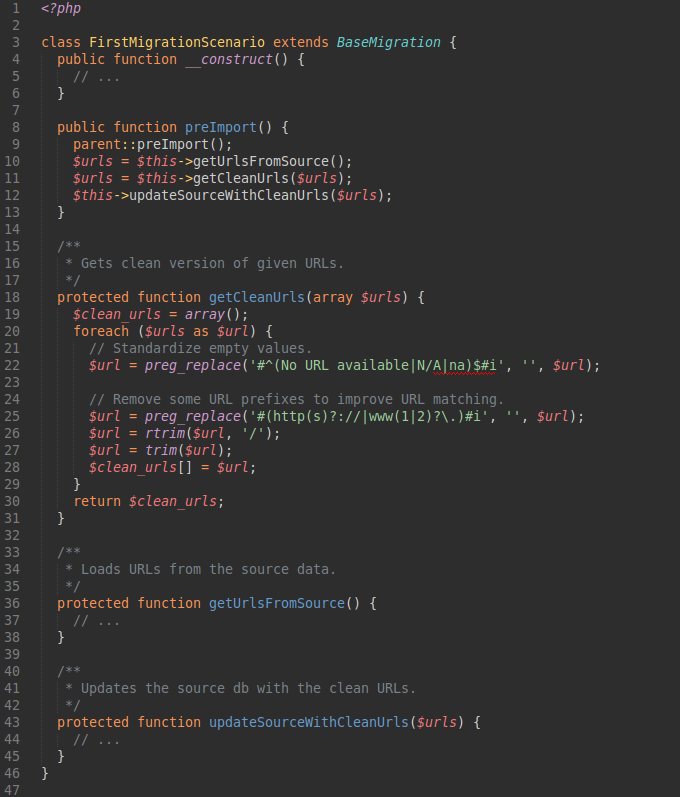
The next step in the data processing: we noticed that the data coming from the CSV files was not standardized as well as the other data, with some invalid characters in some fields. We decided then to use the preImport() method to handle the data and clean it up before the migration process started.

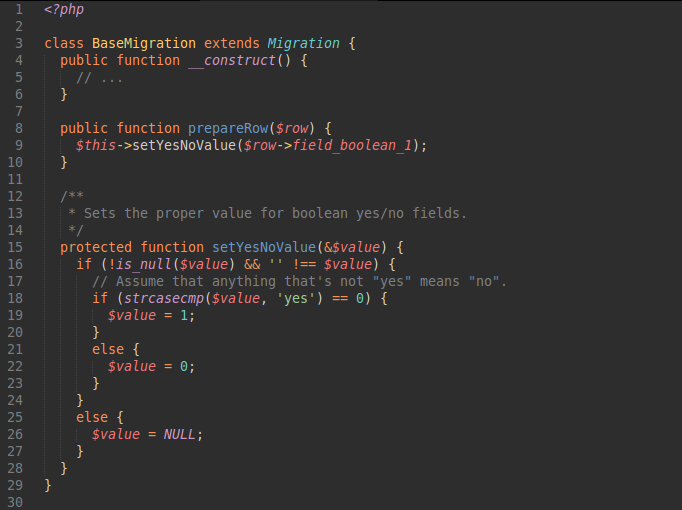
preImport() method.One of the challenges for this migration was to match the type of data from all sources into Drupal's schemas. Some source fields were simple string values that needed to be converted to their equivalent in the Drupal database. To handle most of the scenarios, we have used the prepareRow() method provided by the Migrate module to verify and update the data before it was saved in the database. For instance, some fields with values of “Yes” or “No” needed to be converted to booleans (values 1 and 0 respectively) as per Drupal's requirements. Another example was the strings from the old site that were transformed into new taxonomy terms in Drupal.

prepareRow() method.For some entries in the old site source there was a reference to another entry in that site. If the Migrate module had not already migrated that reference, it wouldn’t be able to fill in the data properly. We ended up using the createStub() method provided by the Migrate module to create a temporary entry in Drupal, so the module could move on with its process and later replace it with the proper entry from the old site.
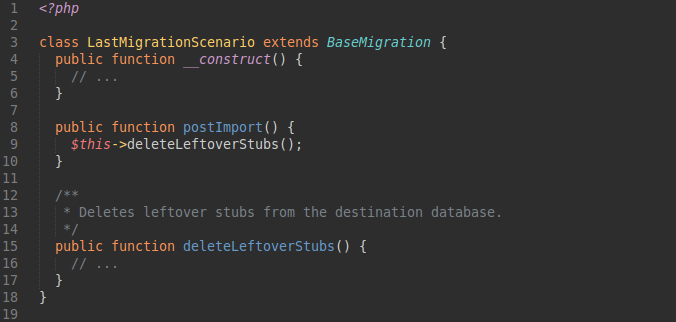
Finally, we used the postImport() method to allow us to clean up some leftover data from the database as soon as the whole migration finished, completing the last migration step.

postImport() method.Lessons Learned
As mentioned, one of the big challenges we faced was that the data was not properly standardized. One thing that we could have done was to make sure everything was properly “cleaned” before starting the migration.
Another issue that challenged us during the development and testing of the solution was the query's performance -- really slow due to the amount of fields and joins, unfortunately an unavoidable issue in our scenario.
Challenges aside, the migration was completed successfully thanks to the Migrate module and its API. That allowed us to reuse most of the code for all the migration scenarios.


